Sunday, April 27, 2014

How Does Your Garden Grow - April 27


Tadaa! Ok so there's nothing going on here. It's all dead leaves and grass for now, but hopefully in a few months it'll be packed with deliciousness! I've been out turning all the dead stuff trying to aerate it, and we just planted a few radishes today. I'm sure it's too early, but I've been itching to get some stuff going!

In other news

The greenhouse is still intact! I weighted it down with cement blocks and bags of mulch, which took out the bottom layer of shelving, but I figured the sacrifice was worth knowing that it wasn't going to blow away. And it's not like the bottom shelf is very useful anyway. Here are the pictures from inside the greenhouse:

Peas


These were a huge surprise to me. I had the seed for these for 3 years (I think, possibly longer) and didn't store them properly. I just thought I'd see what happened and planted 8 of them. 3 germinated, which I'm totally happy with. They were treated seeds, which I'm not really fond of, but I'm even less fond of wasting food. I'm going to direct sow more of them once I feel a little more confident with the weather.

Squash


I'm pretty happy with these little guys too. I planted these mid-March and they survived a greenhouse tip and took their transplanting like champs. I'm going to pland more of these too. This will be the first time I try to grow squash, and decided on butternut this year because we know that Karver likes it. We used some store bought ones for baby food last year, and hopefully we will have some fresh ones this year.

Onion


I've never tried onion from seed before either, so I thought I'd try it out. I'm not expecting much from these. I planted the first batch (in the round pot) the first part of February. They're hard to see in that picture, but there are 3 of them. The second batch was planted mid-March. They are staying alive, but don't seem to be growing at all. I realize that they are in containers, but I feel like they should be getting bigger too. Of course, it's possible that they are growing and I just can't tell. I hope.


Watermelon


Most of these didn't make it through the great greenhouse tip of '14. The few that did survive seem fairly healthy. I'm planning to start more of these this week and really hope they make it. I love watermelon!

Tomatoes


You can't go wrong with tomatoes right? Well, we'll see. I've grown seedlings before but this will be my first year from seed. They are still tiny. I'm kind of worried about these, but want to learn how to grow them from seed so I can start buying heirloom and saving seeds. I have a couple of varieties, but they got mixed together when everything got dumped. I have lots and lots and lots of these. I'm hoping they start growing once it warms up.


Peppers


I've got some bell, and some jalapenos. There are some tomatoes in the pictures too. These will be really interesting because they all got mixed together, so I may develop some new mutant peppers this year! I'm going to start more seeds soon so I can tell them apart too.


Lettuce


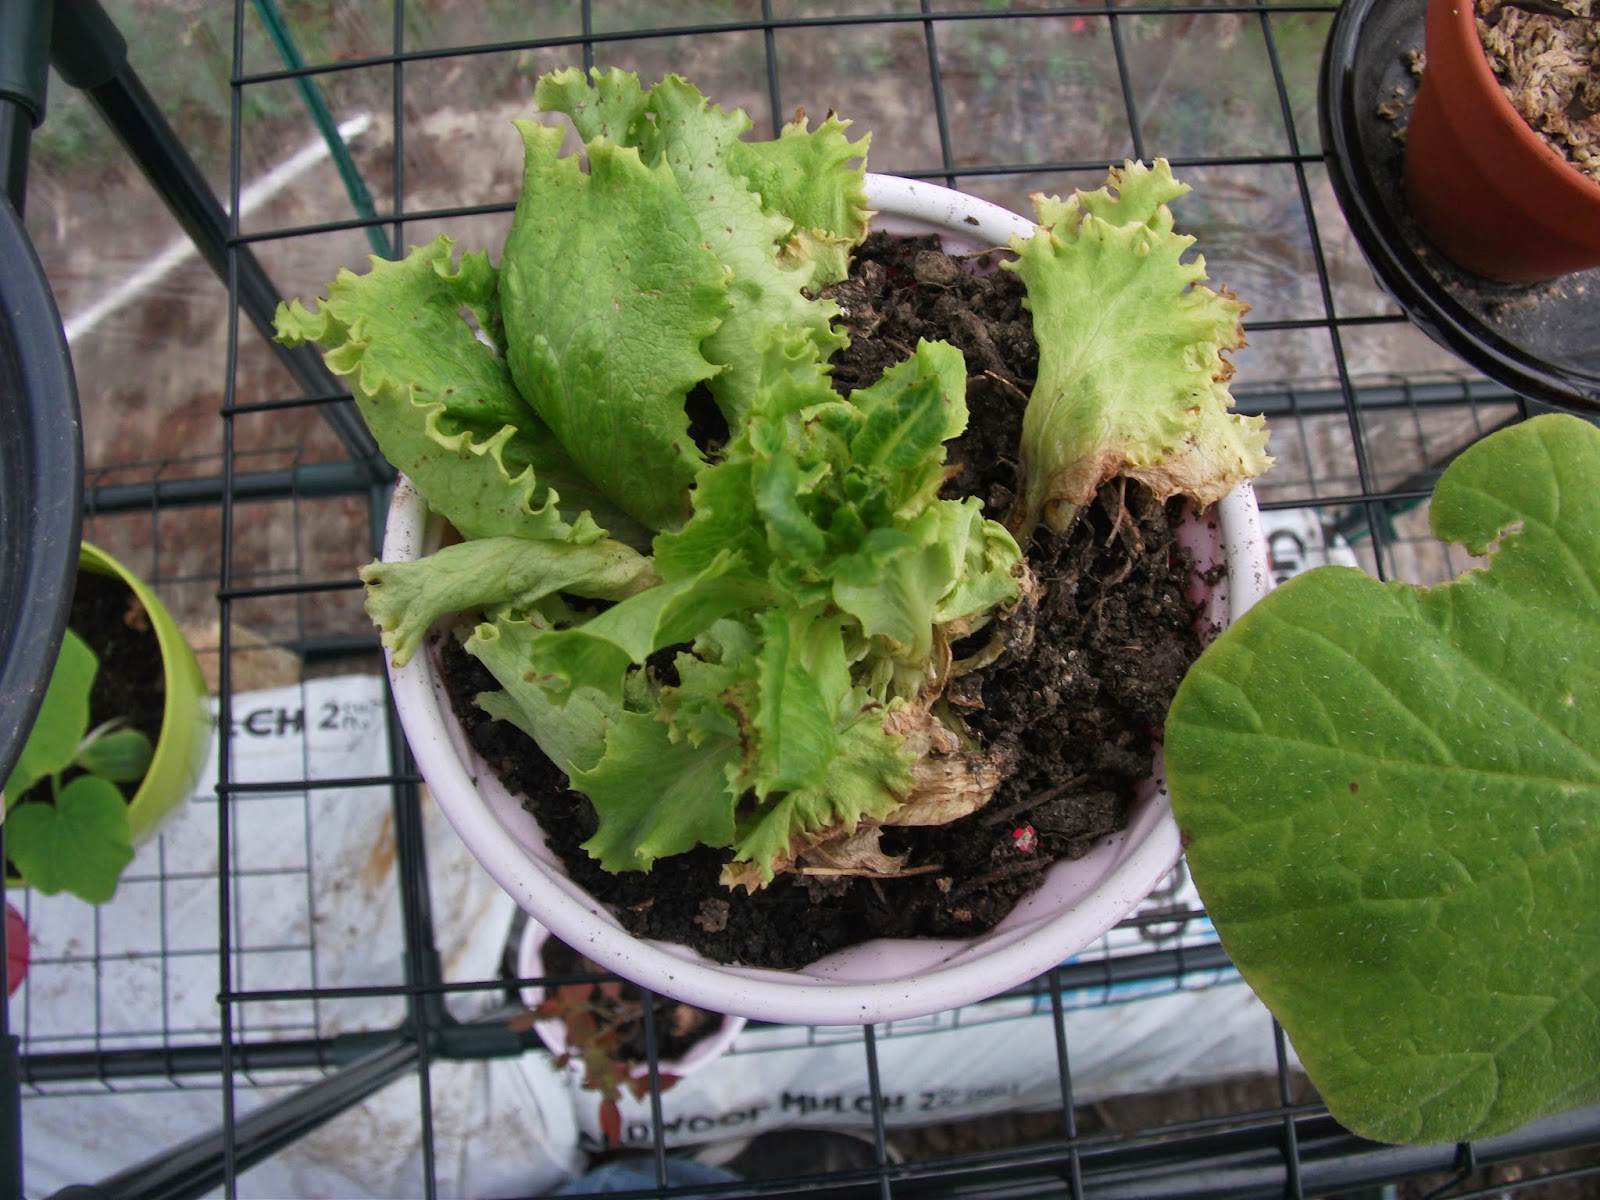
This is something else I don't have a lot of hope for. This is from some lettuce that I tried regrowing. It was doing great in the water, but when I put it in dirt it got all shrivelly and sucky. I'm hoping that it's just transplant shock and that it'll snap out of it. I may need to get it into a cooler place than the greenhouse during the day too.

Store bought stuff


From Meijer, I have some basil, mint, and rhubarb. I've been snacking on the mint, and hope to find a way to use some of the basil soon. The rhubarb is supposed to mature in a year, I just have to decide where I want to put the rhubarb patch. 


Also from Meijer is this grapevine, which I thought I killed. Thankfully it bounced back (I'm going to attribute it to my homemade compost I planted it in.


 ...And raspberries
 ... and a peach tree!

and say what you want about me, but I think the peach blooms are really pretty!


Strawberries! I'm planning on getting more too


I also have a couple of blueberry bushes from Burpee. They will bring my total to 5. I thought 1 got killed over the winter. I don't know if something nibbled on it or just ran past it and broke it off, but I saw one single little bud on it, so there's hope!
 My other 2 have started budding too!
planted these black raspberries a few years ago from my parents' house. They alternate years, so this year should be the first year I get fruit from it. They also self rooted a ton of starts, so I cut them off from the parent plant, and may soon be overrun by them!


These don't technically count as something I grew, but I'm planning on eating some dandelion for the first time this year. There are so many recipes I've been looking at. Does anyone have a favorite?

Flowers


 I assume these are a weed, but I kind of like them. I've seen them everywhere this year. Does anyone know what they are?
Hostas? I've never seen them flower like this though, so I could be wrong. They look awesome in person.


That's it so far! I've got a lot going on, and a lot more planned. If you have any advice for me, please feel free to leave comments below!!

Worm City: Upgrading to Worm Metropolis

Ok, technically with the new population, it's still smaller than a village, but compared to before it has become a metropolis. Seeing that I could keep worms alive and that they did not drive Emily completely nuts made me want to get more. I am American after all, so I will always want more. Of course, that also means that I want fast results, so knowing that there were 60 worms in my bin, I ordered 1000 more off of the internet. I got mine from Redworms.com (unfortunately I'm not getting paid to say that either). They got here in about a week and a half because they only ship on Mondays. I didn't really know what to expect when they came, and half-expected a crunchy mass of spaghetti noodles in a plastic bag. Luckily, they fared much better than my fears. They arrived in a Priority Mail box, inside a green cloth bag. When I picked the bag up, I could feel it moving from the worms burrowing inside. It was definitely strange.


Notice that the bag is from Uncle Jim's Worm Farm. This is another website that I almost bought from, but it was $1-2 more than the site I chose. I don't know if the sites are related, or if they resell Uncle Jim's worms, or if they just recycle bags. In any event, I paid a little less for them. They are shipped in super dry peat moss, which dehydrates them. This sounds really weird, but it's supposed to keep them from freezing in the winter and overheating in the summer during shipping. It also slows them down, which causes them to eat less.


There were a few of the spaghetti noodles I was expecting in the box. The bag was tied shut, but a few of them obviously had a death wish. As soon as you get them, you're supposed to dump a cup of water in to start providing moisture for them. The instructions say that it can take 48 hours for them to get back up to full movement. They also provide a warranty that if they aren't perked up within the 48 hours, they will send a new bag of worms. If you are adding the worms to a new bin, they recommend that you let the bin sit for a week so that the beneficial bacteria has time to grow and the worms have plenty of food. They don't like fresh food. After letting the water soak for a few minutes, you dump them in!


Now there's a big pile of dirt and a pound of worms in your bin.


And here is the finished product. I left my bag in the bin turned inside out for a couple of days just in case there were any stragglers in the bottom or corners. It is recommended that you put a light over the bin for a couple of days to encourage burrowing, but I didn't do this and didn't have any problems with worms trying to escape. At the time of this writing, I've had the worms in the bin for just over a week and haven't had problems with them. I have found a few of them at the bottom of my modified double bin, but have been able to get them back in the bin before their death. The bedding seems to be getting reduced and I have found castings all over the sides of the bin.

Wednesday, April 9, 2014

Building My First Greenhouse

A couple of months ago I found a greenhouse on sale at Big Lots. It is the Village Green basic walk-in greenhouse. Full price is $70, but I got it on sale for $50. I have been wanting a greenhouse for several years, so I couldn't resist the price. Buying it, I knew full well that there was a very good chance that it would be a big pile of junk and I would have to return it. It's been eating away at me that it's been sitting in my garage, just waiting to be put together. After many snowstorms and ceaseless rain, I finally got a day off when the weather somewhat agreed with me. It was a little chilly, but hey, you've got to take what you can get.
 
 
Inside the box are bags with all the parts.
 
 
Each bag is labelled...
 
 
...so you can tell what parts are shown in the instructions. The instructions are very simple, which had me worried for a little bit, but luckily no description is necessary. Putting it together reminded me of putting together a tent.
 
 
Eva even helped with it.


The frame was really easy to put together. I have been more frustrated trying to put together those pressed wood furniture kits. It felt slightly flimsy, but the whole time I kept reminding myself that it was a budget greenhouse. I could have put it together myself, but Eva wanted to help. Connecting the top frame to the base frame was a little tricky on my own, and an assistant would have been helpful for putting on the cover, but it was all doable alone. It took me about 30 minutes total, and probably would have been a little less without waiting for Eva to delicately put the frame together, but the time invested was worth it.
 
 
Then I forgot to take a picture of the finished product until it was getting dark out.
 
Pros:
Price
It's fairly sturdy
It heated up pretty quickly inside
It's a greenhouse!
 
Cons:
The shelving is pretty flimsy. I'm going to try to figure out something to make it better though.
It's really light, which is great for moving around, but bad for the winds we get at times. For tonight I have it weighted down with the milk jugs full of water that can be seen in the photo, but I will be getting concrete blocks to tie it down. It comes with little hooks to put into the ground, but as I have it on my concrete driveway that isn't an option. They look like they'd just pull up in strong winds anyway.
The zipper on the flap seems like it's going to be an issue. I already had some problems with it and it tore the cover in a small spot. I can fix it with duct tape, but it's definitely an issue.
 
Overall, I'm happy with my purchase. I knew from the beginning that it wasn't going to be a premium product, but was pleasantly surprised with how well it's actually put together. Like everything else in my life, I will probably be fiddling with this to hopefully improve it, but out of the box it's a pretty solid product.

Worm City Update

It's been over 2 weeks since I started my vermicomposting adventure and so far my worms are still alive. I have lost at least one worm though. I found its dried out little body lying on the kitchen floor. After the funeral procession, I just put it back in the bin for the other worms to do what they wish with it. I have also found a few in the water on the tray and Eva found one trying to escape across the bathroom floor. I have done some more research and found that finding a few worms a week outside of your bin is normal, but if you find a bunch it means that you're putting too much food in it or not putting enough water in. It can also mean that you're putting too much water in and flooding them out.
 
Being the bleeding heart that I am, I want to make sure none of my poor worms turn into spaghetti noodles, so I have made some improvements. I thought I was being original, but have since seen a few videos on YouTube using this method. It will also make it easier to collect and use the water runoff (aka worm tea) for my plants.
 
 
This is my original setup. It worked well, but the worms had free reign if the decided to get out. I tried putting some screen in the bottom of the bin, but still found one outside afterwards. 
 
 
For my improved system, I moved the bricks inside of another bin...
 
... and then put my original bin inside of the bin with no holes. This will keep any escaped worms contained, as well as make it easier for me to access my worm tea.
 
As far as the composting, it is going really well. I can tell that the stuff is getting broken down, and have not noticed any foul odors coming from the bin. I've been putting the pulp from my juicer in and a few days worth of coffee grounds. Emily has said that she likes the worm bin because she doesn't have to wait for me to take out the compost. I have decided to go all in with this method and ordered a pound of worms off of the internet.

Monday, April 7, 2014

Stuff I've Repurposed: Sink Strainer Sieves

Today at Meijer, I was looking for a sieve. When I made my homemade ginger beer, I had to use a colander from my daughter's toy kitchen to strain off the ginger, which worked, but took forever. So I decided to give in and purchase a sieve. They didn't have any, but did have a set of 3 screening colanders for $9.99. Then I found a set of 3 sink strainers for $2.99 which looked a lot like sieves.
 
 
After testing it out with some ginger, I approve. It took me no effort to make ginger tea. Just let it soak and lift it out.
 
 
I realize that buying something new isn't exactly "repurposing," but if you happen to have these lying around, they make perfect strainers for teas, as well as sinks!